


Also available in 🇵🇱 Polish and 🇪🇸Spanish
A standard piece of advice for beginner programmers is that you learn most effectively when working on your personal projects. It’s good advice, but you can find yourself struggling to follow it—especially if you are very new to the IT craft. This article acts as a step-by-step guide that you can follow to start on your projects and learn along the way. My examples are with the frontend web development stack—HTML + CSS + JS,—but you can adapt this approach to any technology you’re using.
Pick a simple use case
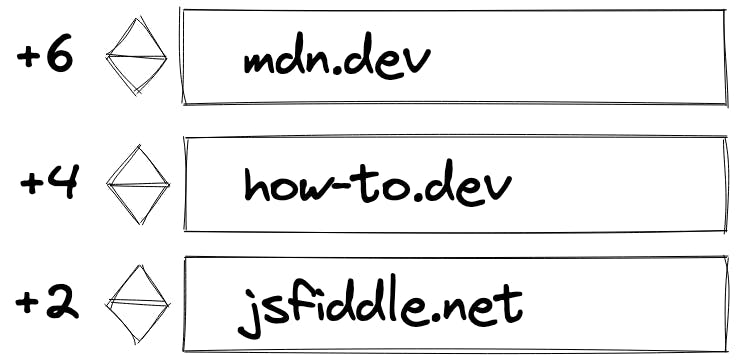
The first step: don’t try to bite off more than you can chew. It’s common for people to attempt to build things like clones of popular websites, but doing this results in more features than one can realistically develop. If you insist on taking inspiration from existing products, try simplifying it to an extreme:
- if you build a Reddit clone, build a hard-coded link list (for example, best programming websites) where people can up or downvote, OR a link list where you just add links to a long list
- if you build an Airbnb clone, make just a static property listing—no booking and no adding new properties
- if you build an Uber clone, create an order summary page—a ride from point A to point B
Another approach is to work on some cliche examples: a TODO application or blog page. Those can feel repetitive and boring, but at least the use case is well understood, and it shouldn’t overwhelm you.
Sketch the interface
When you’ve selected your use case, take a pen and paper and draw your interface. You should get started with one page or a max of two pages. In the beginning, a paper sketch is perfect; your goal is to iterate quickly, and a low-tech solution works great for it. In collaborative projects, people use fancy applications for designs, but they introduce some headaches—you need to install some app, learn the interface, etc., which slows you down. Your sketch here clarifies your thoughts, and once it’s done, you will use it for nothing more than taking a look or two at it while building the interface.
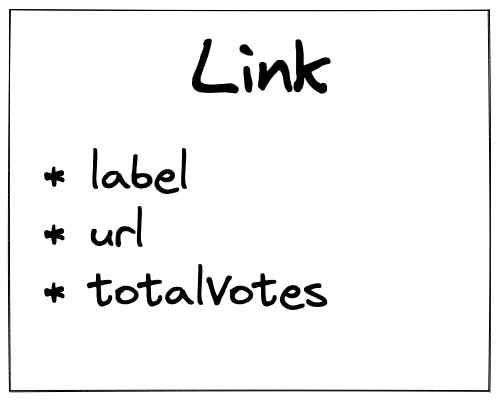
Design the data schema
Based on what you are displaying on the various screens, you will need to have some data in your application. Map each value you show or use to a field you’ll have in the data structure. For our previous examples:
- ‘Reddit’ will have posts or links, with
title,URL, and maybevotesorvoteCount. - ‘Airbnb’ will have properties with
name,photo,description,price, andlocation. - ‘Uber’ will have rides with
from,to, andestimatedCost. - The TODO app will have tasks with
title,description. - The blog will have posts with
title,body, andpublicationDate.
Build the interface
With all that preparation complete, you are ready to open the code editor. The user interface is the most tangible and probably the most straightforward part of the project. You will create an HTML file and maybe add CSS if you feel like making your app somewhat pretty. Your goal is to create what was drawn up before and display it the easiest way possible. Especially if you are adding styling, keep in mind that “done” is better than perfect—don’t spend too much time on it unless CSS and design are your learning priorities.
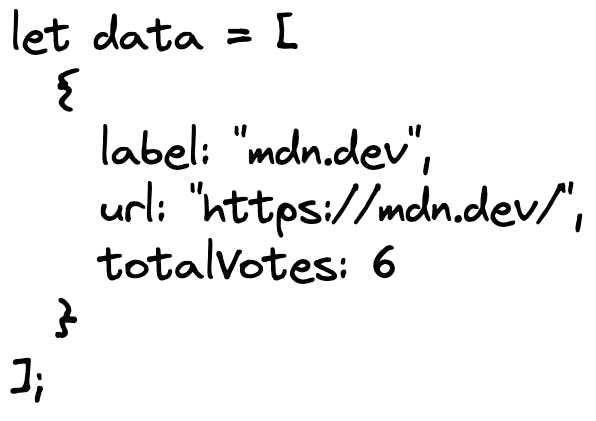
Create mock data and update the interface to use it
When you are done with HTML with hard-coded data, your next step is to make a dynamic interface. At this stage, you will be adding JS to your project. You can limit yourself to vanilla JS and recreate the HTML with DOM, or you can add a JS framework you are either familiar with or want to learn. You’ll need to create a temporary data structure in a variable and recreate the HTML form JS based on the data in the variable.
Add some logic
Once you display dynamic data, you can add some logic to manipulate it. In our simplified example, the logic will be rather simplistic—adding one record to the list or updating one or two values in the existing data. The main goal here is to make sure our app is alive—so the user can click the interface and changes are made to what’s on the screen. This is mostly proof that you can manipulate data. As you continue working on the example, the logic will become exponentially more complicated. In that case, each added feature has to work with all the existing ones. Enjoy the time when it’s so simple it feels unremarkable!
Store your data
The next step is to set up some kind of persistence for the changes in your data. You can consider the following things:
- localStorage or sessionStorage – for quick and dirty local testing
- simple third-party storage – something like Airtable or Google Sheets
- no-backend storage – firebase or a similar system
- dedicated backend build – by yourself for more practice
Let me know in the poll or in the comments if you’re interested in learning more about any of those approaches. I’m thinking about creating articles with examples, and if I know that there is demand, I’ll be more motivated to work on them.
Iterate!
Once you follow all these steps, you should have a somewhat usable application. It will be far from a minimal viable product, but you should have something to show to people who are cheering you on in your studies. If you want to continue working on your project, the next step is to figure out what other use case you want to cover in your app and begin going through the steps again. This time it should be more accessible, and you should be able to skip some steps.
What next?
Feel free to share the results of your experiment in the comments! If you liked the approach proposed here, you can continue it with learning data modeling.